
Haben Sie das Gefühl, dass die Scheinwerfer Ihres Autos für eine ausreichende Beleuchtung zu niedrig sind?
Beim Fahren in der Nacht ist eine klare Sicht auf die Straße entscheidend für die Sicherheit. Die richtige Einstellung der Scheinwerfer Ihres Autos verbessert nicht nur die Sicht, sondern reduziert auch die Blendung für entgegenkommende Fahrer. In diesem Artikel teilen wir die Schritte zur korrekten Einstellung der Scheinwerfer Ihres Autos, damit Sie bei Nachtfahrten optimale Beleuchtung haben. Lassen Sie uns diese einfachen, aber wichtigen Einstellungstechniken durchgehen, um Ihr Fahrerlebnis sicherer und zuverlässiger zu machen.
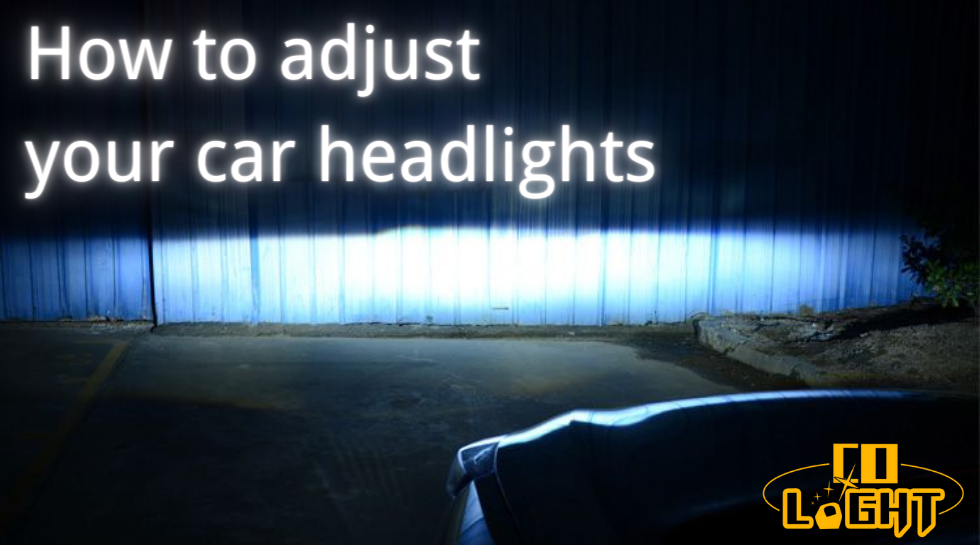
Wie man Scheinwerfer einstellt
Wir wissen, dass nicht alle Fahrzeuge mit der Funktion "Scheinwerferhöhenverstellung" ausgestattet sind und nicht jeder Fahrer eine Taste zur Scheinwerferhöhenverstellung im Cockpit hat. Wie stellt man sie in solchen Fällen ein? Gibt es alternative Methoden? Im Folgenden teilen wir zwei Methoden zur Einstellung der Scheinwerferhöhe.
(1) Drehen Sie die Innenraum-Scheinwerferhöhenverstellungstaste
Die meisten modernen Fahrzeuge sind mit der Funktion "Scheinwerferhöhenverstellung" ausgestattet, und im Cockpit befindet sich, wie in der Abbildung gezeigt, eine Taste zur Scheinwerferhöhenverstellung:

Die im Bild rot umkreiste Taste ist die Scheinwerferhöhenverstellung. Wenn man sie nach oben dreht, wird die Lichtprojektion abgesenkt, während sie beim Drehen nach unten erhöht wird.
Setzen Sie sich auf den Fahrersitz und drehen Sie die Taste, während Sie die Scheinwerfer beobachten. Sie werden eine deutliche Veränderung bemerken, was die Bedienung einfach macht.

Es ist jedoch wichtig zu beachten, dass diese Taste gleichzeitig beide vorderen Scheinwerfer links und rechts steuert. Wenn Sie den linken oder rechten Scheinwerfer einzeln einstellen müssen oder wenn Ihr Auto keine Funktion zur "Scheinwerferhöhenverstellung" hat, also keine spezielle Taste zur Höhenverstellung vorhanden ist, müssen Sie die zweite Methode verwenden.
Wenn individuelle Anpassungen für den linken oder rechten Scheinwerfer erforderlich sind, geschieht dies oft, wenn ein Scheinwerfergehäuse beschädigt ist. Nach dem Austausch eines neuen Gehäuses kann der Projektionswinkel vom alten Gehäuse auf der anderen Seite abweichen, was separate Anpassungen für das neue Gehäuse erfordert.
(2) Einstellung der Feineinstellungstaste am Scheinwerfergehäuse
Bei einigen Automodellen ohne die Funktion "Scheinwerferhöhenverstellung" gibt es möglicherweise keine spezielle Taste zur Höhenverstellung der Scheinwerfer. Es gibt jedoch immer eine Feineinstellungstaste am Scheinwerfergehäuse selbst, wie im Bild gezeigt:

Die beiden weißen Tasten, die im obigen Bild rot eingekreist sind, sind die Feineinstellungstasten. Mit einem Inbusschlüssel können Sie diese drehen und anpassen, um Veränderungen im Lichtbild zu beobachten.
Das Bild zeigt das Aussehen nach dem Entfernen des Scheinwerfergehäuses. Vor dem Ausbau, wenn es am Fahrzeug montiert ist, wären die Winkel wie gezeigt.

Im Allgemeinen reicht es aus, die Höhenverstellungstaste im Cockpit zu verwenden, wenn Sie die Scheinwerferhöhe anpassen müssen. Es ist nicht notwendig, die Feineinstellungstasten am Scheinwerfergehäuse zu verstellen, es sei denn, es liegt eine Situation vor, bei der auf einer Seite ein neues Gehäuse montiert ist und die Höhe des Lichtbildes sich deutlich von der alten Seite unterscheidet. In solchen Fällen ist eine Anpassung des neuen Gehäuses erforderlich; ansonsten müssen die Tasten am Scheinwerfergehäuse nicht berührt werden.
Die Knöpfe an der Scheinwerferbaugruppe dienen der Feineinstellung, und der Einstellbereich ist nicht groß. Außerdem ist es wichtig, die Bedienung nicht zu erzwingen, um Schäden an der Scheinwerferbaugruppe zu vermeiden.
Einstellwerkzeug: Inbusschlüssel
Die überwiegende Mehrheit der Scheinwerferbaugruppen verfügt über Feineinstellungsknöpfe, die mit einem Inbusschlüssel bedient werden. Verwenden Sie einfach einen Inbusschlüssel, um die innere Inbusschraube zu drehen und einzustellen. Der Inbusschlüssel sieht wie der auf dem Bild unten aus:

Stellen Sie die Sechskantmutter so ein, dass die linke und rechte Scheinwerferhöhe einheitlich ist.
Wie bereits erwähnt, steuern die Feineinstellungsknöpfe an der Scheinwerferbaugruppe jede Baugruppe einzeln. Bei Fahrzeugen ohne Scheinwerferhöheneinstellknopf können Sie die Scheinwerferhöhe durch separate Einstellung der linken und rechten Scheinwerferbaugruppen anpassen.
Bei Fahrzeugen mit dem "Scheinwerferwinkel einstellen"-Knopf im Cockpit, aber ungleicher Höhe links und rechts, können Sie durch die Einstellung einer der Scheinwerferbaugruppen eine einheitliche Höhe erzielen. Die Einstellmethode ist im folgenden Diagramm dargestellt:

Durch die Einstellung können Sie eine einheitliche Höhe für die linken und rechten Scheinwerfer erreichen.
Einstellmethode
(1) Einstellung der linken und rechten Höhe: Ob Sie nun den Knopf im Cockpit betätigen oder mit einem Inbusschlüssel die Mutter an der Scheinwerferbaugruppe einstellen, beide Einstellungen sollten mit Blick auf eine Wand vorgenommen werden. Wählen Sie zunächst eine ebene Fläche, parken Sie das Fahrzeug etwa fünf Meter von der Wand entfernt und stellen Sie sicher, dass die Fahrzeugkarosserie senkrecht zur Wand steht. Prüfen Sie, ob die linke und rechte Seite auf gleicher Höhe sind. Es ist akzeptabel, wenn die rechte Seite etwas höher als die linke ist. Wenn die rechte Seite niedriger als die linke ist, können Sie mit einem Inbusschlüssel die Einstellmutter auf der rechten Seite der Scheinwerferbaugruppe justieren.

(2) Einstellung der Projektionsweite der Scheinwerfer
Nachdem sichergestellt wurde, dass die Höhen auf beiden Seiten übereinstimmen, besteht der nächste Schritt darin, die Projektionsweite der Scheinwerfer einzustellen, das heißt, die Höhe beider Scheinwerfergehäuse gleichzeitig anzupassen.
Fahren Sie das Auto auf eine ebene und offene Fläche und messen Sie eine Entfernung von 30 Metern. Die Abgrenzungslinie des Abblendlichts sollte ungefähr bei der 30-Meter-Marke liegen. Wenn sie zu hoch eingestellt ist und das Licht zu weit projiziert, kann dies die Sichtbarkeit für entgegenkommende Fahrer beeinträchtigen.


Natürlich kann die Situation bei verschiedenen Scheinwerfergehäusen variieren. Wenn die Einstellung des Abblendlichts auf 30 Meter dazu führt, dass das Fernlicht zu hoch ist, ist es möglich, sowohl das Abblend- als auch das Fernlicht leicht abzusenken. Allerdings können individuelle Vorlieben variieren, und Anpassungen sollten je nach den spezifischen Umständen vorgenommen werden.
Beim Fahren in der Nacht ist die korrekte Einstellung der Höhe der Scheinwerfer Ihres Autos entscheidend für die Fahrsicherheit. Durch einfache Einstellschritte können Sie sicherstellen, dass die Scheinwerfer des Fahrzeugs einen angemessenen Bereich ausleuchten, um blendende entgegenkommende Fahrer zu vermeiden und gleichzeitig die Sicherheit von nahegelegenen und entfernten Fahrzeugen zu gewährleisten. Denken Sie daran, den Einstellvorgang vorsichtig durchzuführen und übermäßige Kraftanwendung zu vermeiden, um Schäden am Scheinwerfergehäuse zu verhindern. Wenn Sie unsicher sind, ist es ratsam, professionelle Techniker um Hilfe zu bitten.Die Wartung des Frontbeleuchtungssystems Ihres Fahrzeugs in gutem Zustand trägt zu erhöhter Sicherheit und Komfort bei Nachtfahrten bei. Wir hoffen, dass die in diesem Blog bereitgestellten Einstellmethoden hilfreich sind und Ihnen eine sicherere Erfahrung bei Ihren nächtlichen Fahrten ermöglichen.